Way back when I first looked at clay beads I love all the canes. People were just starting to use Skinner blends in things and the canes were becoming more realistic looking. I drooled and admired and did nothing for a few years. Then I got a copy of Sue Heaser’s book and made the face cane. The first one turned out well! I was stoked. Since then I’ve done about 30 of them along the same line and here’s the process for the latest one. This one is a little bigger than most of mine but since complex canes are a real time investment I figured I would make it as big as I can easily handle in one work day!
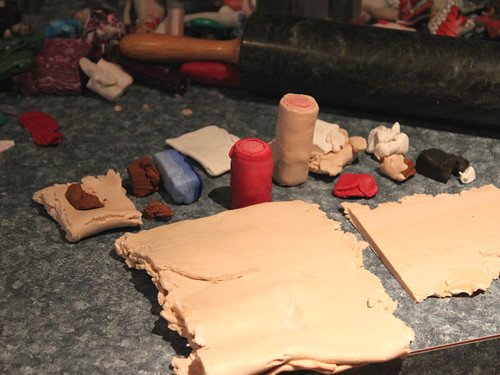
First step is to prep your colours. I wanted the cane to come in around a pound. I drew out my diagram and mixed clay. Having done this before I knew my proportions. I made the component canes first, once I had the colours mixed or the blends done.
This is all of the components done and then wrapped with flesh clay and laid out. It is a little larger than my diagram but not much. Usually I make the eyes MUCH too big and have to reduce them more than this. This time they were just a shade too big in relation to the cheek and nose and I left it alone instead of fussing with it.
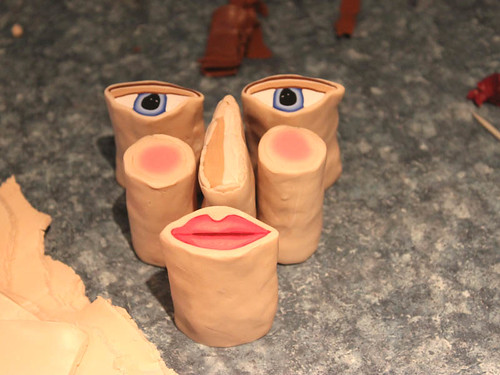
The next step is to begin joining your parts. I start with between the eyes with a triangle / wedge shape. Then I jam the nose into it. Then I add triangles / wedges to the cheeks to join them to the nose and the eyes.
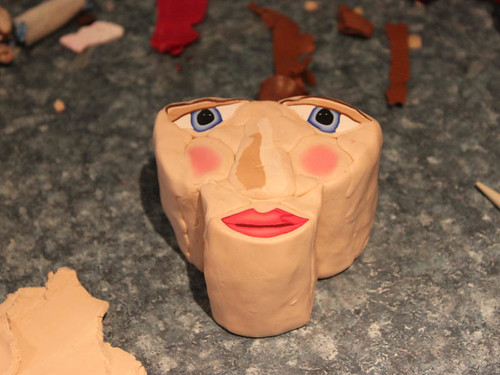
Here it is with a little of the scraps of making it. I did well this time – most of my “extra” is just too much highlight or shadow clay. No six inches of eyeballs.
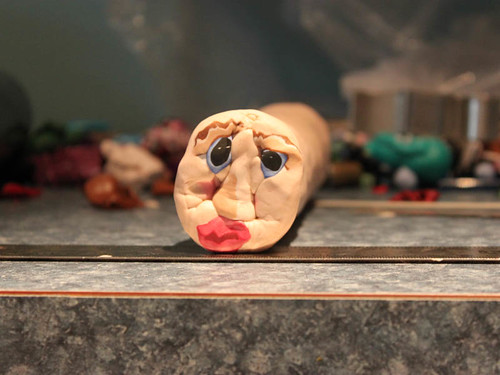
The distorted ends of face canes are some of the best parts. IÂ packed the cane enough and worked it quickly enough that it didn’t distort that much. Even the actual ends were recognizably still faces which may be a first for me. Very little waste here even at 1/2 the diameter (which is 1/4 of the over all area)
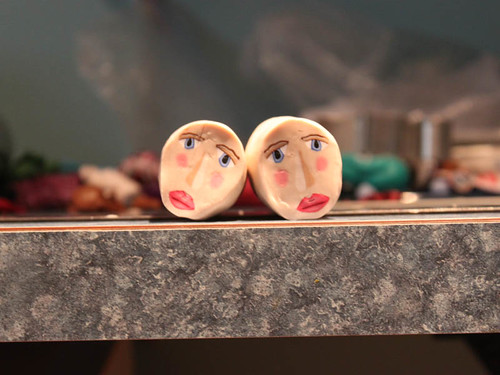
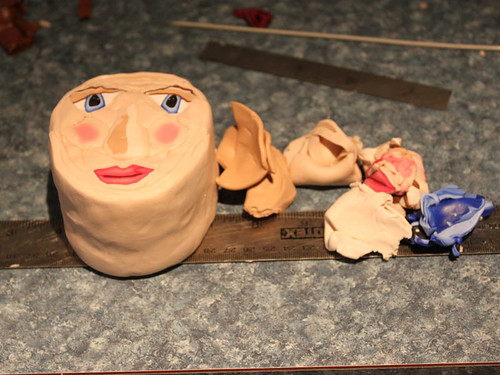
Once I got the cane to 1/4 of the initial diameter, about 1 1/4 inch tall and several feet long, I cut in half and put away half. The other part I continued to reduce until it’s 1/2″. At this size there is some distortion on the ends, enough that I cut an inch or two off each side. At the 1/2″ size, there is about 60″ worth of good cane.

This is my assistant. Since I started this early in the morning and my family was out camping this weekend, he was clingy and trying to get stepped on while I mixed colours. By the time I finished prepping though he was bored and sleeping.